Gallery Line
- katharinetapley7
- Jun 16, 2023
- 4 min read
This is a post for anyone who has more drawings than they know what to do with.
Nine times out of ten, that’s people who have young humans living with them. If that's not you, you can either ignore this and come back for next week’s post, or give this a skim, and then share it with people who can put this advice to use.
A few notes before we get to THE THING:
1. I’m not the person who came up with the idea of photographing artwork and making a book out of it. I wish I was because they’re a freaking genius. You can toss so many of the hard copies, right? Obviously, not the special stuff, but if they go through a phase where they make twelve drawings of Pikachu in a week? Yeah, you don’t need to keep all of those.
2. If you don’t want to go through the photograph/photo book route (because that costs money) get a three-ring binder and a hole punch! If it’s made our of something that won’t punch, the plastic sleeves* that we used back when reports were printed? Back in the nineteen hundreds? Those work great. (I use those plastic sleeves for a lot, and I will make posts mentioning those in the future.
But, this is advice you can get anywhere.
Here's what I'm talking about today.
Have you seen those frames where you can display a piece of artwork, one at a time, and backfill the pieces? They function as storage and display? Those things are clever!
Let’s say that you don’t want to spend money on those. Or, you want the equivalent of the old-school refrigerator door, but make it décor? Multiple pieces of art, all at once?
Here’s an idea.
What you need:
Wall (duh)
Level (maybe not a need, but it’s going to look better with it.)
Pencil
Yardstick
Cool looking twine/ribbon/string
Clips (binder clips in fun colors, or shiny ones, or wooden clothespins)
Furniture tacks
Hammer
What I used, you might want, depending on the wall
DAP DryDex dry time indicator spackling
Sandpaper (fine grit)
Removable wallpaper
The steps:
1. The wall I was working with had dings and holes from old frames. So, fill the holes from old frames with this miraculous stuff: DAP DryDex dry time indicator spackling. It goes on pink, so you can see it, and then dries white, so you know when it’s dry!
2. Sand the little holes.
3. At this point I did a thing that was purely “Let’s give this a shot.” Since I didn’t have the wall color anymore and had no desire to find it, I used a paper cutter to cut perfect squares of removable wallpaper and used those to cover the holes. It’s not for everyone, but I love the pixel-y thing it’s got going on.
4. This is where the yardstick came out. I had already decided that these hanging segments were going to be about 36” across and 24” down. I made sure everything was level, marked the lines with a pencil, and lightly tapped the (pretty, flower shaped) furniture tacks in just enough for the twine and baker’s string to be looped around them later.
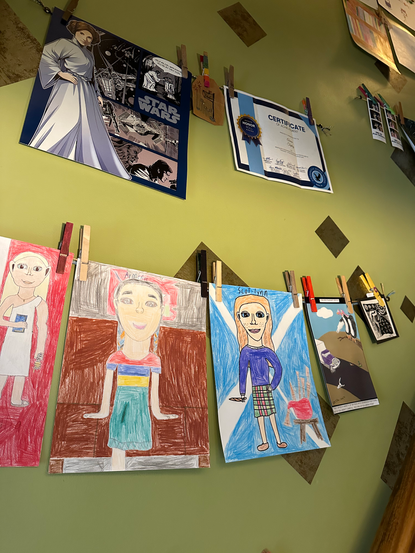
5. I took hemp twine and some colorful baker’s string, wound it together, and made a rainbow of rows!
6. Once I saw that it all worked, I finished hammering the tacks in so that they were flush with the wall, and the strings were tight.
7. The kids and I picked out what was going to be hung up, and the rest of the art went into the Art Bin (big copy paper box that we store under the TV stand .)
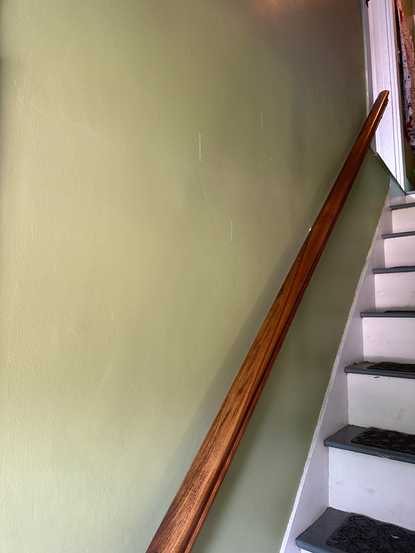
Now this stairwell has is a gallery that can constantly change, and can display the latest drawings from my kids and my Dad, the photo booth shots from my kid’s last hang with her bffs, and a couple of cool posters that we've been holding on to and hadn't put anywhere.
I did this over a few days, but I timed the time I spent actively working on it.: Start to finish, this was a 3 hour project. And the money I spent was:
1. DAP DryDek: $5.47 at Target
2. Mondo Llama 12 Count Craft Twine: $5.00 at Target
3. Hillman 25-Count 1-in Brass-plated Cut Tack: $1.78 at Lowe’s
4. We already had a ton of wooden clothespins, but I looked it up. You can get 50 for $1.25 at Target. Not too shabby.
5. Removeable Wallpaper: So, this was leftover from another project. I bought the roll for $34.99 at Target, but used less than 2 feet of it. I’m still going to include it in the price, because I used it, even though it’s not a thing you need need. I used about $5.00 worth of it. I would not suggest you buy an entire roll of it unless you have a larger project that you are going to use it for.
Start to finish, here's what it looked like:
I'm very pleased with how it turned out, and I think that this is a clever and customizable way to display the work that my family does.
You could use ribbon, fishing line, yarn! I would love to see it done with metallic binder clips!
How would you customize this for your space?


Comments